


Getting Started with Spring Boot, Spring Boot has emerged as one of the most popular frameworks for developing Java-based applications. Its simplicity, convention-over-configuration approach, and productivity features make it a go-to choice for both beginners and experienced developers. In this guide, we will focus on “Getting Started with Spring Boot” and how you can use it to accelerate your application development.

What is Spring Boot?
Before diving into “Getting Started with Spring Boot,” it’s important to understand what Spring Boot actually is. Spring Boot is an extension of the Spring framework designed to simplify the setup and development of new Spring applications. It helps you create stand-alone, production-ready Spring applications with minimal configuration.
Spring Boot aims to make application development with Spring simpler by using a set of conventions that reduce the need for boilerplate code. It comes with embedded servers, such as Tomcat or Jetty, which means you don’t need to deploy WAR files separately. This feature allows you to run your application directly by executing a JAR file, making it easier to deploy and test.
Key Features of Spring Boot
As we continue getting started with Spring Boot, let’s take a closer look at some of its most notable features:
- Auto-Configuration: Spring Boot intelligently guesses the configuration you need and automatically sets it up for you.
- Embedded Servers: Spring Boot provides embedded servers like Tomcat, Jetty, or Undertow so you can run your applications without any external server.
- Starter Dependencies: It comes with several starter dependencies that simplify the process of setting up different functionalities for your project.
- Actuator: Spring Boot Actuator helps you monitor and manage your application.
- Rapid Development: With Spring Boot’s convention-over-configuration style, you can focus on building business logic rather than dealing with complex configuration details.
Why Choose Spring Boot for Rapid Application Development?
“Getting Started with Spring Boot” for rapid application development offers a wealth of advantages, especially for those looking to kickstart their projects quickly. Below are some of the reasons why Spring Boot is an excellent choice:
- Easy Setup: You don’t need to worry about tedious XML configurations or boilerplate code. Spring Boot uses annotations and sensible defaults to minimize setup complexity.
- Reduced Development Time: Thanks to features like auto-configuration, starter templates, and embedded servers, you can get started more quickly and reduce the time spent on infrastructure.
- Microservices-Friendly: Spring Boot is perfect for building microservices-based architectures, offering out-of-the-box support for RESTful services and scalability.
Getting Started with Spring Boot: Setting Up Your Environment
To start getting your hands on Spring Boot, you need to set up your development environment. Below are the steps to get started with Spring Boot:
Step 1: Install Java
The first step to getting started with Spring Boot is to have Java installed. Make sure you have Java 8 or later installed on your machine. You can download the Java Development Kit (JDK) from Oracle’s website or use an OpenJDK version.
To check if Java is installed, run the following command:
java -versionStep 2: Set Up an IDE
The next step in “Getting Started with Spring Boot” is to choose a good Integrated Development Environment (IDE). Popular choices include:
- IntelliJ IDEA: Has excellent support for Spring Boot.
- Eclipse/STS (Spring Tool Suite): STS is built specifically for Spring development and is ideal for beginners.
Step 3: Use Spring Initializr
Spring Boot offers a great tool called Spring Initializr to generate a project quickly. Spring Initializr provides a web interface where you can set up a Spring Boot project by selecting the project type (Maven/Gradle), dependencies, and configurations.
Visit https://start.spring.io/ to create a new project. Fill out the fields like Project Name, Group, Artifact, and choose the dependencies you want (e.g., Spring Web for REST APIs).
Once you generate the project, you can import it into your IDE for development.
Creating Your First Spring Boot Application
Now that you are getting started with Spring Boot, let’s create a simple “Hello World” application to understand how it all works.
Step 1: Create a Main Application Class
Every Spring Boot application requires a main class annotated with @SpringBootApplication. This annotation is a combination of @Configuration, @EnableAutoConfiguration, and @ComponentScan, which helps bootstrap the application.
Here is an example of the main class:
package com.example.demo;

import org.springframework.boot.SpringApplication;
import org.springframework.boot.autoconfigure.SpringBootApplication;

@SpringBootApplication
public class DemoApplication {
    public static void main(String[] args) {
        SpringApplication.run(DemoApplication.class, args);
    }
}
Step 2: Create a REST Controller
To demonstrate the basics of getting started with Spring Boot, let’s add a simple REST endpoint to return “Hello World”.
package com.example.demo;

import org.springframework.web.bind.annotation.GetMapping;
import org.springframework.web.bind.annotation.RestController;

@RestController
public class HelloWorldController {
    @GetMapping("/hello")
    public String helloWorld() {
        return "Hello World!";
    }
}
In the example above, @RestController makes the class a RESTful web service, and @GetMapping("/hello") defines the endpoint.
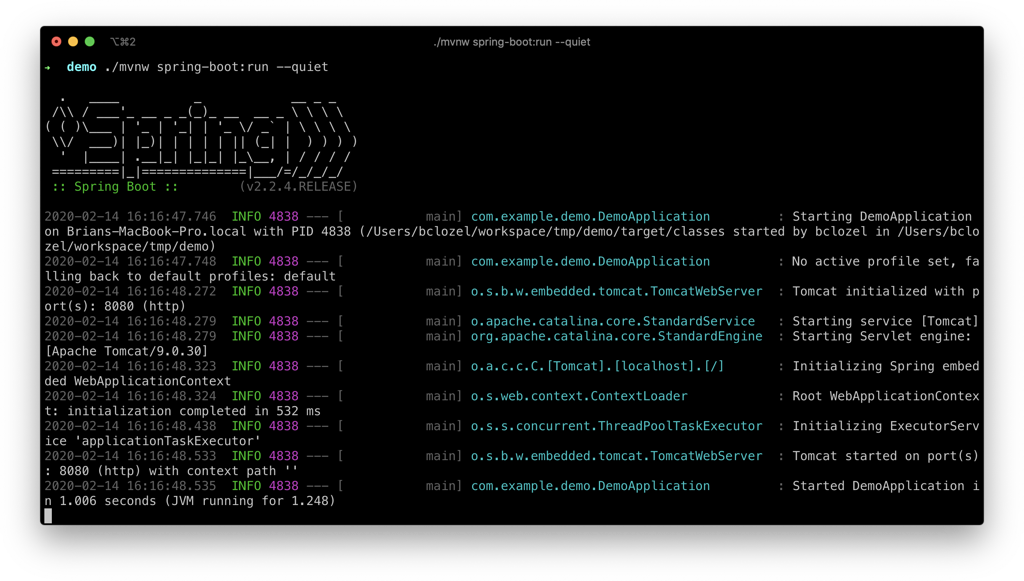
Step 3: Run Your Application
To run your application, navigate to the root directory of your project in the terminal and use the following command:
./mvnw spring-boot:runAlternatively, you can run the main method in your IDE. Once the application is running, you can visit http://localhost:8080/hello in your browser, and you will see “Hello World!”.
Exploring Spring Boot Annotations
When getting started with Spring Boot, you will frequently encounter various annotations that make coding faster and easier. Some key Spring Boot annotations include:
- @SpringBootApplication: Combines multiple annotations to start your Spring Boot application easily.
- @RestController: Used to define RESTful controllers.
- @GetMapping, @PostMapping, @PutMapping, @DeleteMapping: Used to handle HTTP methods like GET, POST, PUT, DELETE.
- @Autowired: Used to inject dependencies automatically.
Managing Dependencies with Starters
Spring Boot provides starter dependencies that help you get started with minimal configuration. If you want to add a web layer to your application, you can use the spring-boot-starter-web dependency. For database access, spring-boot-starter-data-jpa is commonly used.
Using starters, you avoid manually adding a list of dependencies and configurations to your pom.xml file. Here’s how you can use a starter in your Maven pom.xml:
<dependency>
    <groupId>org.springframework.boot</groupId>
    <artifactId>spring-boot-starter-web</artifactId>
</dependency>
Spring Boot DevTools for Faster Development
When getting started with Spring Boot, productivity matters. Spring Boot DevTools is a handy dependency that helps speed up the development process by enabling features like automatic restart and live reload. It can be added to your pom.xml as follows:
<dependency>
    <groupId>org.springframework.boot</groupId>
    <artifactId>spring-boot-devtools</artifactId>
    <scope>runtime</scope>
</dependency>
This will help in seeing the changes in real-time without needing to restart the entire application every time you make a modification.
Monitoring Your Application with Spring Boot Actuator
Spring Boot also provides Actuator, which allows you to monitor and manage your application in production. It adds endpoints like /actuator/health, which gives you information about your application’s health status.
To use Spring Boot Actuator, add the following dependency:
<dependency>
    <groupId>org.springframework.boot</groupId>
    <artifactId>spring-boot-starter-actuator</artifactId>
</dependency>
Summary: Getting Started with Spring Boot
We’ve covered a lot about “Getting Started with Spring Boot” to help you understand the basics and how to set up your first application. Spring Boot is a powerful and convenient tool for rapid application development, providing ease of setup, productive annotations, and features like auto-configuration, embedded servers, and Actuator monitoring.
By following this guide, you should now have a working Spring Boot application and a better patihtoto understanding of its components. The next steps would be to explore more advanced features like data access, security, and building RESTful APIs with Spring Boot.
Spring Boot’s focus on convention-over-configuration and its rich ecosystem make it an excellent choice for both beginners and seasoned developers. Keep exploring and building, and you’ll find that Spring Boot significantly speeds up your application development process.